Meal Planning

I am a fan of meal planning. I enjoy planning out my meals for the week and that works great for us. Since I am a stay-at-home mom, I don’t need to rely on my prepping skills, unless on super busy days then I try to prep; just a smidge.

Below is a picture of the menu planner I follow. Since I enjoy cooking, I found this helpful in keeping things interesting and fun.

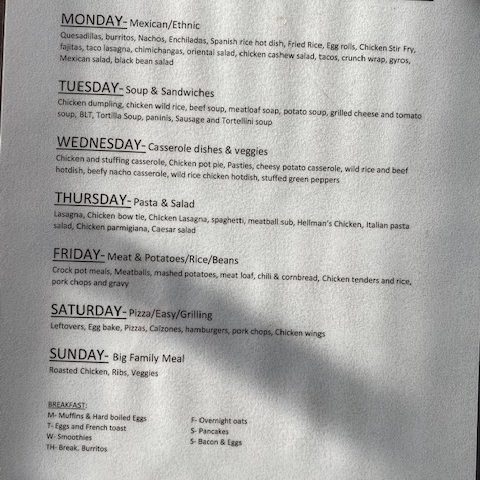
(This photo is a little bigger than I would like, but here you get the idea.)

How I meal plan.

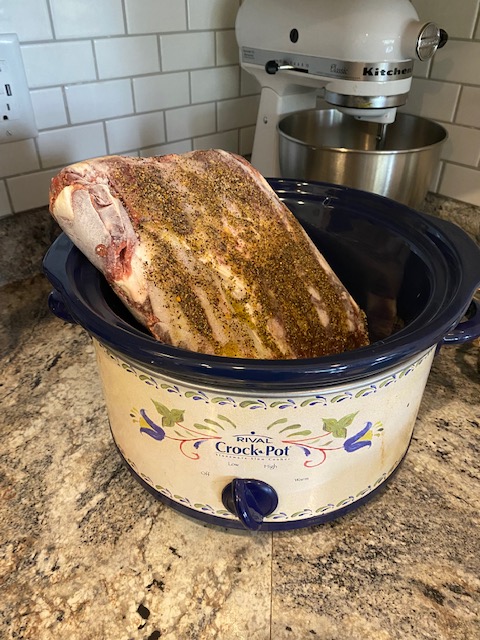
I sit down Sunday morning before church or Monday morning, and I write out two weeks’ worth of meal ideas (and snack ideas). Then I look at our weeks. If we are super busy one day, I schedule to have dinner done the day before for that busy day or I plan to use the crockpot. Examples would be casseroles that I can make on my slow day and then just pop into the oven the next night for supper.

Why do we meal plan?

I choose to meal plan for several reasons. First would be because it makes supper convenient. I have no reason to not have a good meal on the table.

(Beef Roast was a little too big for my crockpot. But that’s ok, I just covered it with aluminum foil.)

Second, we choose to meal plan for budgeting. If I go to the store for the things I need for my suppers, then I don’t overspend buying ingredients to make those fancy dishes in the future. I go every 2 weeks when my husband gets paid and buy according to my list. If I have extra time during my meal planning, I will write out a list, as I am meal planning, what ingredients it takes to make that dish. That way I can look to see if I have anything on hand before going to the store. Another tip I do is, if items are on sale, like beans or cheese, I will buy a few more to keep on hand in case I didn’t plan right or if life happened and I couldn’t make my meal, then I have some quick options.

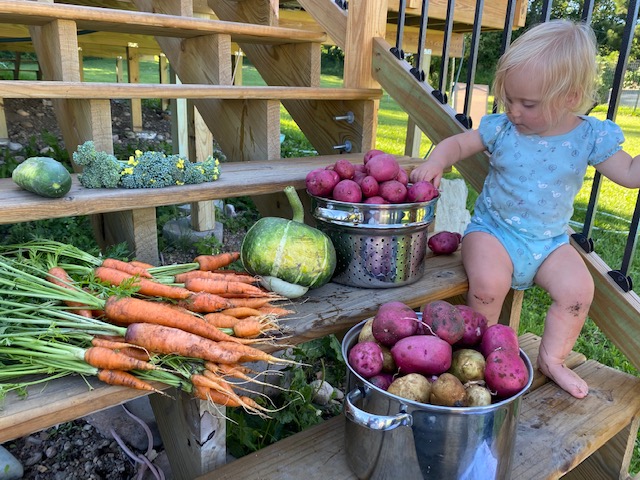
Third, is to make sure we eat what we buy. To not be wasteful. I know we’ve been caught in that trap of having extra food on hand and we ran out of time to eat them before they went bad. I’ve bought all these vegetables one time “thinking” I was going to make them for supper and then they got lost in the drawer and forgotten about. And I hate wasting money.

Last reason, and probably ranks up there with number one, is for preparation for bad weather. Especially during winter. Living in Northern MN is gorgeous. But when we get snow and wind the last thing my husband or I want to do is go shopping. This is another reason why we keep our pantry pretty stocked.

It’s time consuming.

It is very time consuming to meal plan and cook every single meal. I get it. Not a lot of parents have this option. Maybe you could make a few meals on the weekend as a family to keep in the fridge for the week. Or you could make 2-4 lasagnas at once and freeze them to pull out later.

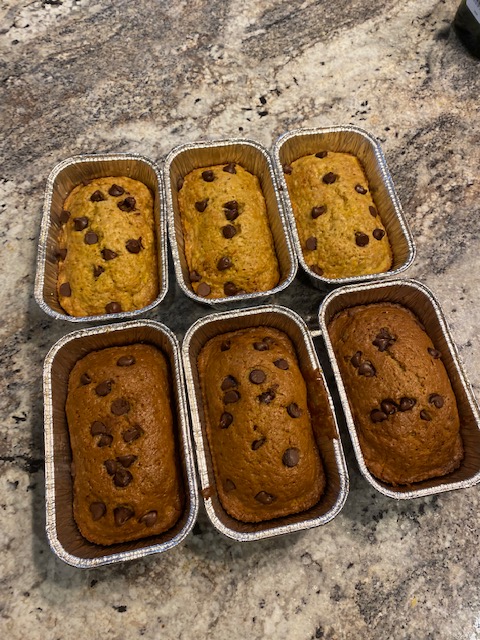
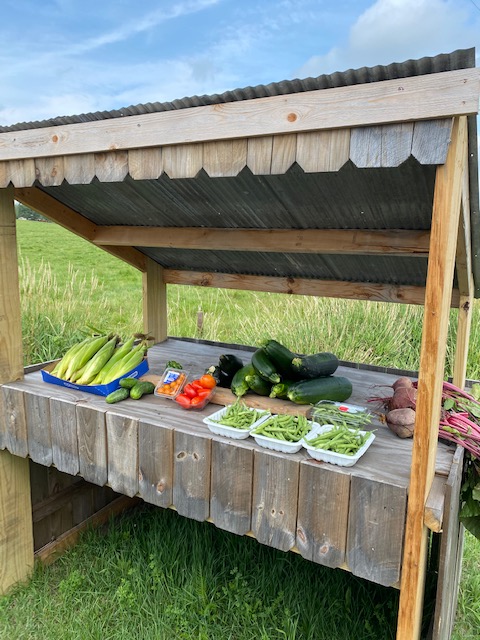
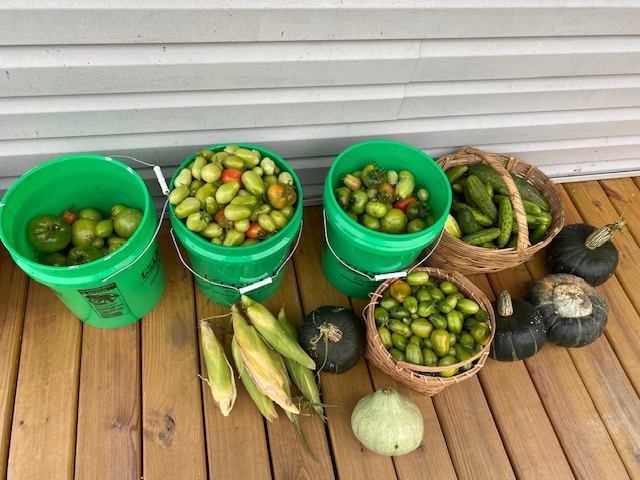
This year our garden produced A TON of zucchini, so one cool fall day I made around 15 mini loaves of zucchini bread for the upcoming school year. I was going to use this for a quick breakfast or a snack idea. Time consuming, but the result was perfect and there were days when I needed a quick breakfast or snack for the kiddos!!

It can be a healthier option

I have a deep passion for cooking and making A LOT of things from scratch. Over the last 4-5 years, I have stumbled upon heritage cooking. That may be a blog post in its own. But for now, we’ll just talk about how it is healthier. Again, I know not a lot of families have this option either or the time. But since I stay home, I have some time on my hands and this is what I choose to do with it.

(Food from our farm. Non-GMO and non-soy fed chicken, homegrown mashed potatoes and squash, and some homegrown ingredients for the dressing.)

Over the years I’ve watched our health turn for the better. We eat less processed foods, less sugar, less preservative and overall less chemicals. Cooking is also a therapy for me, so mentally healthy!

So as you can see, meal planning has a lot of great benefits. It can be time consuming, it may appear to cost a little more up front, but in the end it saves money. And it makes those busy nights less stressful.

Give it a try and let me know how it goes.

Homeschool year 1

What lead us here?

Since before I had kids, I thought about homeschooling.

I remember the first day I looked into it. I was at work, part time job at a local therapy office, when I had this sudden urge that I needed to stay home and raise my 7-month-old baby. I was researching stay at home mom schedules, what to clean on what days, how to meal plan, how to make cleaners from scratch. And then, how to homeschool. I wanted all of that. A few weeks later I quit my job and stayed home.

How we came to the decision

Despite all my research on Homeschooling, my husband and I sent our 4-year-old to preschool in 2017. We both grew up going to public school and knew no one who had been homeschooled, so we felt more comfortable doing public school that year. I always thought about homeschool and it remained on my mind daily.

Fast forward 2.5 years, and it now was an option, unfortunately thanks to Covid. I spent all summer reading books, blogs, watching YouTube videos on what curriculums to use, started following people on IG for inspiration and getting questions answered. That’s all it took, and I was HOOKED. This was the right path. I was really excited and had a fire inside me that this is what we are meant to do.

So, I started buying supplies, we built a homeschool shelf, I got a new rug for our dining room. I wanted to have our school room downstairs, but with a little baby, it made sense to keep it all upstairs.

Homeschool VS Public School

The spring of 2020, we had to do distance learning and that was very difficult. Since it had all happened so fast no one was really prepared for it. It made me question if homeschool was like this.

Turns out it’s not! Homeschooling was so much easier than I had excepted. It took time getting use to the amount of time it took to school. But with the curriculum we bought, it was made simple for us. I would open the book, read the ‘teacher’ paragraph to the kids and it would explain it all for me. Then they’d do their work and we’d be done.

We read this book and acted it out outside and tried to see what leaves we could find in our yard and what trees we had on the property.

Curriculum

We started off using TGATB (The Good and The Beautiful) for Language Arts and Singapore for Math. In MN those are the only two subjects required at age 7. I did do art and science on my own. I also bought All About Reading. I didn’t like it at all. I did use the coloring sheets that came with the curriculum and worked into TGATB.

After about 2 months into using Singapore Math for my oldest, we switched to Horizons. The concept taught in Singapore was too much for us. So, I picked something that was a little simpler and it was a perfect fit.

We joined a local homeschool co-op that met every other week. The kids had gym, science, and art. It was Christain based and such a great experience. This was the main reason that I didn’t worry about teaching a science or art curriculum.

Off to homeschool co-op

Great first year

It was a great first year and every single day I woke up feeling like I had found my true path in life. Everything about homeschooling, homesteading and the co-op felt so perfect.

Whatever school option you choose, I pray that you feel confident and happy in it.

Garden Planning 2021

Garden Planning for 2021?! Yes, I am a planner by nature and I have been planning out our gardens, meat birds, egg layers and a new addition to the farm. (That’ll be a surprise for later.)

But today I am going to go over with you how and why I do this.

GETTING READY

Every February I get out our farm notebook and look back at:

*what the garden produced

*how many meat birds we did

*how many crates of fruit

Then I look back to see how long it lasted. This process helps so much with know what I need to buy and when and how much instead of guessing. Writing all this stuff down also helps me to learn to not make the same mistakes again. Whether it’s where I plant things, when I planted it, what it was next too and what mistakes I did make.

LAST YEAR

Last year we did 5 flats of strawberries, 3 flats of blueberries, 2 flats of peaches and a basket full of grapes. I used the strawberries for jam and froze roughly 3 gallon bags of fresh strawberries. For the blueberries I froze them whole and stored in gallon bags. These were good for coffee cakes, muffins, smoothies, pancakes. But for both we ran out by January. That lasted a pretty long time, roughly 6 months. My goal though is to last a full year. So this year I am going to double what I buy.

As for the grapes, the one basket full that we picked I turned into grape jelly and we have a few jars left, so I think it’s safe to say we should get close to a full year’s worth out of that.

For the peaches 2 flats have lasted me awhile, but we don’t eat them often. It’s a special treat. So again, I’m going to double the amount of peaches I buy. But they turned out AMAZING!

GARDENS

As for my gardens, they take a little more planning. Again, I got back to my notebook and figure out what I planted and how long that harvest has lasted me, then I make adjustments. This year we are cutting back. We will grow the same foods, but just not as much.

Last year we planted 5 rows of corn! That yielded ALOT. So this year we are going to plant 3. I’m going to plant more tomatoes because I am out of spaghetti and pizza sauce already. I do this to all things on my list.

I also rotate our garden. I’ve read that doing this helps the soil. If you continue to plant the same foods in the same spot that spot in the soil becomes depleted of certain nutrients. I’m going to look into using straw in the big garden so I don’t have to weed as much. I am also looking at companion planting.

Companion planting is a true & time tested system that encourages growth & boosts natural pest resistance. I have more reading to do on this before I can really plan anything.

MEAT BIRDS

For meat birds, we did 28. That has lasted the perfect amount of time. We left about 12 chickens whole and then cut up the other birds into pieces and used the wings, drummies and thighs for different meals. This year we are going to do 33 for ourselves since we are not doing turkeys this year.

GOOD LUCK

So there you have it, what my family and I do yearly in Feb to get ready for the next growing season. It’s a fun way to start spring. Keeps you organized and helps you to make sure this year will be a great harvest!

DONT FORGET TO FOLLOW ME ON IG at laur.eggert

Harvest Time

Where did summer go??!? I am looking around and I feel like we were just in July a few months ago.

When Covid hit and we were forced to stay home, I was ok with that. I was ok with the idea of being home and getting projects done without the guilt of ‘we should be doing something else’. We got SO MUCH DONE. We made the garden bigger, added more egg layers, meat birds and turkeys this year. We cleaned the garage, painted, reorganized, cleaned up the trees, burned our brush piles, built a turkey and meat bird coop and pen. We used an old garden shed as our new chicken coop. We added a pen area on that too. We took a few more camping trips even. And with a 1 year old, island camping is not the easiest thing to do unless you’ve done it a lot or grew up doing it.

But our main focus this year was food supply. Again, once Covid was here and we saw the shortages on produce and meats and then prices sky rocket we knew that this year we were going to grow enough to not have to rely solely on the store.

Meat bird processing day went great. Lots of lessons learned, but after that day we felt amazing. Knowing that we had provided our family with a lot of meat for the winter. (I’ll do a post on this later.)

Harvest time. We got A LOT. This year we had expanded and made a 40’x40′ garden. We had the plot tilled, new soil added, we put in posts and cemented them in, put up wire, a sprinkler system.

The big garden had: corn, pumpkins, squash, tomatoes, cucumbers, carrots, sweet potatoes, red and white potatoes, zucchini and broccoli.

pumpkins

Our little garden had: more tomatoes, green peppers, herbs. lettuce, green beans. peas and banana peppers.

Last year we had built a produce stand that we put at the end of our drive way. This was a way for us to use up all the food without waste. If we had any extras that we couldn’t eat or use in time we would put it on the stand and let the neighbors take what they want. And then the idea was born of the Community Market. Any neighbor was to contribute if they wanted. It has been a fun little community deal.

This year we had a lot that we could put on the stand. But when all said and done I have: 19 quarts of tomato sauce, 12 pumpkins, roughly 20 squash, a laundry basket of potatoes, we froze over 15 bags of diced carrots and corn. In fact, we had about 176 ears of corn that needed to be picked at last minute due to a freeze warning. I have 9 quarts of canned pickles, and 2 gallon bag of tomato soup frozen along with six bags of 2 cup increments of shredded zucchini for winter baking.

This photo was taken mid August. We got a lot more after this pull.

This was my last tomato harvest. I am still letting the tomatoes rippen so I can use them.

I know this was a long, rambling post, but I had lots to catch up on. Hopefully I can get back into the routine of writing once a week! Until then you can catch me in the kitchen finishing up my canning or schooling our girls, which is another post in itself.

Have a wonderful week!!!

Wool Dryer Balls

One thing that I did before choosing to go a more natural life style was buy some wool dryer balls from a friend who had recommended them. I had no clue about them, but she raved about them so I figured I would try.

Benefits

Wool dryer balls are WONDERFUL! They are cost effective, save on drying time, helps to reduce static and you can use any scent of essential oils on them.

100% Natural

Wool dryer balls are 100% all natural. No chemicals or perfumes. As I said before you can scent them with any essential oil(s) you want. When I want good smelling blankets I will use lavender. That will also provide a calming effect for those little kiddos. During and after sickness I will use thieves and to get rid of stinky bathroom smell I will use Purification. Of course there are a thousand other options. After 2-3 uses of the dryer balls you will need to scent again.

Time Saver

The dryer balls also help to cut down on static. I have noticed when using drying balls my laundry is done 7-10 mins faster. That’ll depend on the load size. It will also depend on the size of the balls you make and how many balls you have. I use 3-4 tennis ball sized dryer balls. If my laundry load is really big due to jeans or blankets I will use up to 5. But using to many dryer balls and too much drying time will also create static. So you will need to experiment with your dryer, the size wool balls you make and the normal size of laundry clothes you have.

Cost Effective

I also enjoy knowing that I am using a product that has no chemicals that will stay on my clothes or my kids’ clothes and get onto the skin and cause irritation. And I also like the cost. I think a package of wool yarn can cost $5-$7, but they last forever! The balls I had bought 7 years ago still work. They are starting to unravel, but all I have to do is reshape them and follow the process and they will be like new!

To find out more about the making process and other benefits, Pinterest has a ton of information for you.

First Time Meat Bird Raisers

Welcome Babies

April 2, 2020 was a fun day on the little farm. We welcomed 41 meat birds for the first time. This has been a dream for 2 years, so today is bitter sweet.

It has been a lot of learning as we truck along even though we asked question upon question. How do we keep baby chicks? How and when do we transition them to the coop? Do they eat ALL the time? Better to limit food?

Remember, we raised egg layers but that was 8 vs 41 and meat birds grow at a much rapid pace then layers therefore require an enormous amount of water and food. We chose 41 meat birds because we, again, are expecting some to die and we are raising a couple for the in-laws.

Week 1 – Day 1

Before my husband came home with all the chick babies, we had gotten this old water bin from the neighbor. It was perfect! We washed it and got it all prepared. Filled it with wood chips, got food and water stations ready and got heat lamps hung so it was warm for them.

Since the chicks are so little we didn’t want to have to clean out the whole bin every few days so we added a tote in the middle as a divider. And I’ll list the reasons this worked out so well!

  • Kept the chickens closer together to provide warmth.
  • Easy cleaning.
  • Tote provide security.

To clean the bin out, I would move the food, water and lamp to the other end. This side already had clean wood chips. Then I would lift the tote that was in the middle of the bin and the chicks would run to the other side. Once all were over, I would place the bin back down and clean out the dirty side. Once the dirty wood chips were scooped out, we would put down clean wood chips, so it was ready to go a few days later. This was ideal and super easy. We went from cleaning every 2-3 days to every day within a week!

Growing babies weeks 1-2

Over time we would move the tote back further in the bin giving the chickens a little more room every week. Eventually we had to get rid of the tote. They loved the extra room and it is important to let them walk around to keep their legs strong. We started hanging their food and water to also help build strength in their legs. Since meat birds are so heavy its especially important that they stand to eat and that water and food aren’t placed right next to each other. Spacing them out makes them walk.

Weeks 2-3

These birds grow SO FAST! They were almost triple their size by 2-3 weeks old. The tote was out of the water bin by the end of week 2-2.5. We are cleaning it daily, watering them every 12 hours and feeding them about every 12 hours as well.

They are also getting their feathers in and poor things look so ugly and cold. Since we have the tote out of the middle we added a second heat lamp on the other side of the bin so they could stay toasty.

Week 4

April 23, the chicks are 3 weeks old to us. We have lost 3 already, not sure why.

Today I am putting them in their coop the first time. The days have been sunny and warm. The nights are warmer now too which is something I had to keep in mind when transitioning them. I also made sure they had most of their feathers or close to it. We did put a heat lamp out in the coop incase the temp drops at night as it tends to in Northern Minnesota.

Enjoying the sun and breeze from the coop.

We love having these little birds to take care of. Hard to believe that in 4-6 weeks they will be ready to butcher.

So there you have it. Weeks 1-4 and what it has looked like for us so far. I will keep updating this as the weeks go by. I am hoping to get one more post written this week. I’m thinking on some toxic free dryer balls?!

Egg layers for beginners

Today I want to share with you how to welcome your first flock home!

Congratulations!!!

When we first decided to bring layers home, my husband and I were so overwhelmed. We asked people left and right: “What kind do we get?” “How do we build a coop?” “Free Range or pen?”

Where you live.

Where you live plays a key part in choosing your chickens. We live in Northern Minnesota so we had to look at getting some hardy chickens that still produced enough eggs during the winter tim. We also wanted to get enough chickens so they could keep each other warm in the coop.

We ended up with 4 Buff Orpingtons and 4 Plymouth Barred Rocks. That makes a total of 8. We got a few more than we originally wanted to make up for any that would potentially die.

First 4 weeks


The first 4 weeks we watched them closely. Feeding and watering daily. Moving the heat lamp up slowly every week and cleaning out their bin.

When it came time to clean their bin we would put them in a kiddie pool with fencing around it and let them run and play. My two older girls were younger at the the time and would sit in the pool and play with the chicks. Then we would scoop out the bin and add in fresh shavings.

This is my second daughter Natalie playing with the chicks


Around 4 weeks they had majority of feathers and didn’t need the heat lamp that much. They eventually got to big and messy to be inside the house. The dust they would kick up coated the window sills, table and floor. So outside to the garage they went.

Our garage is heated so if the night was going to be too cold for them we would turn the heat on and make sure it was to their temperature.

They stayed in the garage for another 4 weeks. We made a pen out in the yard that we would bring them out to daily. It became more a chore to round them back up to put back into the garage, but we felt it was important to start getting them use to the outside. The pen was garden stakes, poultry fence and fencing on the top. We had an old plastic dog house we used as shelter for them. They loved being outside!


This is my first daughter, Ava, playing with the chickens outside.

Heat.

When you first get your chicks you want to have their own brooding area to be a balmy 90-95 degrees. By 5 weeks you want the temp around 70-75. And by week 6 you want to be around 65. So each day or every few days you’ll move the heat lamp up. You can buy a thermometer to keep in the bin to know the temp. You’ll also be able to tell whether the bin is too hot or too cold by the chicks; if they are bundled under the lamp on top of each other it’s too cold, if they are far away from the lamp they are too hot but if they are under the lamp but sprawled out, then they are happy!

Food

As chicks they need chick starter; we used Purina chick starter. Then after about 8 weeks they were on egg layer food. We fed the little chicks a lot during the day, but if they ran out at night we didn’t worry. We didn’t start a feed schedule until they were free range.

We decided to let our chickens free range. If we ever saw any problems with predators then we would creat a pen area. So far, so good. We got the chicks in April and by June they were big enough to roam. (Looking back I’d maybe wait another month or so.) But they did good! Getting them to coop up at night became tricky the first few times.

The first day they got to roam was also the first night for them in the coop.

We would turn the Coop light on around 9:l0pm, (yes it doesn’t start getting dark till then during the summer) and they would naturally head back to the coop as the sun was going down. But they wouldn’t go in, so we had to herd them in. Next time I do this stage I would put the chicks into their coop for a few days before letting them be outside free so they understand this is their coop and let them come out on their own time frame around day 3-4. Live and learn! But when we were turning the coop light on we would make a trail of food to their coop and fill their feeders; they would eat at night and get let out the next morning at 11am.

coop

Our coop is nothing special. It was on our property when we bought our house, it’s literally 4 sheets of plywood and a door. We added in two vents on the west side and a window facing south. During the winter we needed to have the coop breath and the chickens needed natural sun light.

The coop is not insulated but with a heat lamp we would turn it on for those -40 nights they did just fine!

First egg

Girls inside the chicken coop with their first egg!

We got our first egg in September! It was a great find! They won’t lay their first egg until around 6 months so we were expecting it to be the first few weeks of September.

We made their nesting boxes 1x1x1 and layered them with hay. We made 3 nesting boxes because I had read that 2-3 hens like to share one box.

And there you have it. How to start with baby layers. I hope this helps and if I missed anything or if you have any questions please feel free to leave a comment or email me!

Spring 2020

Homesteading and the continuing dream!

We have welcomed egg layers to the homestead back in 2018. They were our first step into this life of providing something for ourselves. Once we fell in love with them and having our own eggs at hand the dream started to grow a little bigger.

In the spring of 2019, we added 6 more egg layers & one super sweet baby girl, Emersyn. Throughout that summer again, our garden was producing a lot. (Thank you to the neighbors’ cows for providing that manure for us.) We decided to do a community market.

The main thought behind this was to add any extra food that we were growing, but wouldn’t use before it went bad and would bring it to the stand. Anyone in the community was welcomed to it. The growing season was cut short due to a hail storm and we weren’t able to produce as much. We got enough to feed us, but nothing to add to the Community Market.

In the fall of 2019, we had our neighbor come over a till up a spot for a BIG garden. I have plans for this garden. Some raised beds, nice mulch covered walk ways, fence and gate. I am hoping to start implementing these ideas into the garden here in a couple of weeks. The BIG garden will have: potatoes, corn, carrots, zucchini, onions, squash, pumpkins. And whatever else my husband might want to add. The SMALL garden will have my tomatoes, green peppers, green beans and peas.

Working hard in the garden through the summer gives such an accomplished feeling.

So this sums up where we are at on our homesteading journey today, I can’t wait to see where we are at in a few weeks!!

A New Journey

Hey everyone! Welcome to my blog!!!

I want to give you all a little back ground to my life and what has happened that has lead us to where we are today.

My husband and I bought our second home May 2017. It was a dream. Country community, new build, open concept house, and on 3.55 acres. Waking up to the cows in the early morning and watching the sun rise, we started dreaming what we could do.

But we spent that first year repainting all the walls, putting in new carpet, doors and trim. The house has two levels and the basement is framed in but not finished. That’ll be a project during a cold season, but not this year.

PLANS FOR THE FUTURE

When Pat and I were dating, we would tell eachother what kind of life we wanted. And we ended up coming to pretty much the same conclusion; a house on some land in the country.

But we also talked about how a little hobby farm would be fun. That hobby farm included chickens and goats.

Fast forward 8 years and 2 kids later, the chickens came into the family. We figured if we were going to live in the country we had to partake in the country chores a little.

The same year that we got the chickens, we decided to build a garden. I was just getting into self sustainability. And I loved the idea of growing food for ourselves. This is how our dream started. One thing lead to another and then another.

FIRST GARDEN

That first year with our garden was awesome! We grew tomoatoes, green peppers, cilantro, jalepenoes, 4 kinds of squash, lettuce and rubarb.

This was the summer I learned to can. I made spaghetti sauce and pizza sauce, blueberry jam filling, rubarb jam, apple butter, and green pepper jelly.

This little garden made me realize I really want to start providing my own foods and make whatever I could from scratch. We started buying beef and pork from our neighbors. We knew we wanted to do meat birds but that was a few years out.

The next year our apple trees produced enough apples, (they were planted here before we moved in). Now I was able to add apple sauce to my list of things to can. I wanted to can and save as much as I could for the school year. I wanted to have that garden fresh goodness available to us at any time.

GOING GREEN

Once I figured out the garden, canning and the egg laying chickens, I began to realize that I wanted to live a little greener.

That meant utilizing the clothes line on a regular basis, cloth diapering and using our wood stove as the main heat source vs electric.

I had already been making my own laundry detergent, hand soaps and chap sticks so by adding canning and chicken momma to my list I am starting to feel that dream I had about self sustainability, also known as homesteading.

So there you have it, a glimpse into how I am becoming the person I’ve imagned being. I hope you stick around over the years and enjoy the transformations!